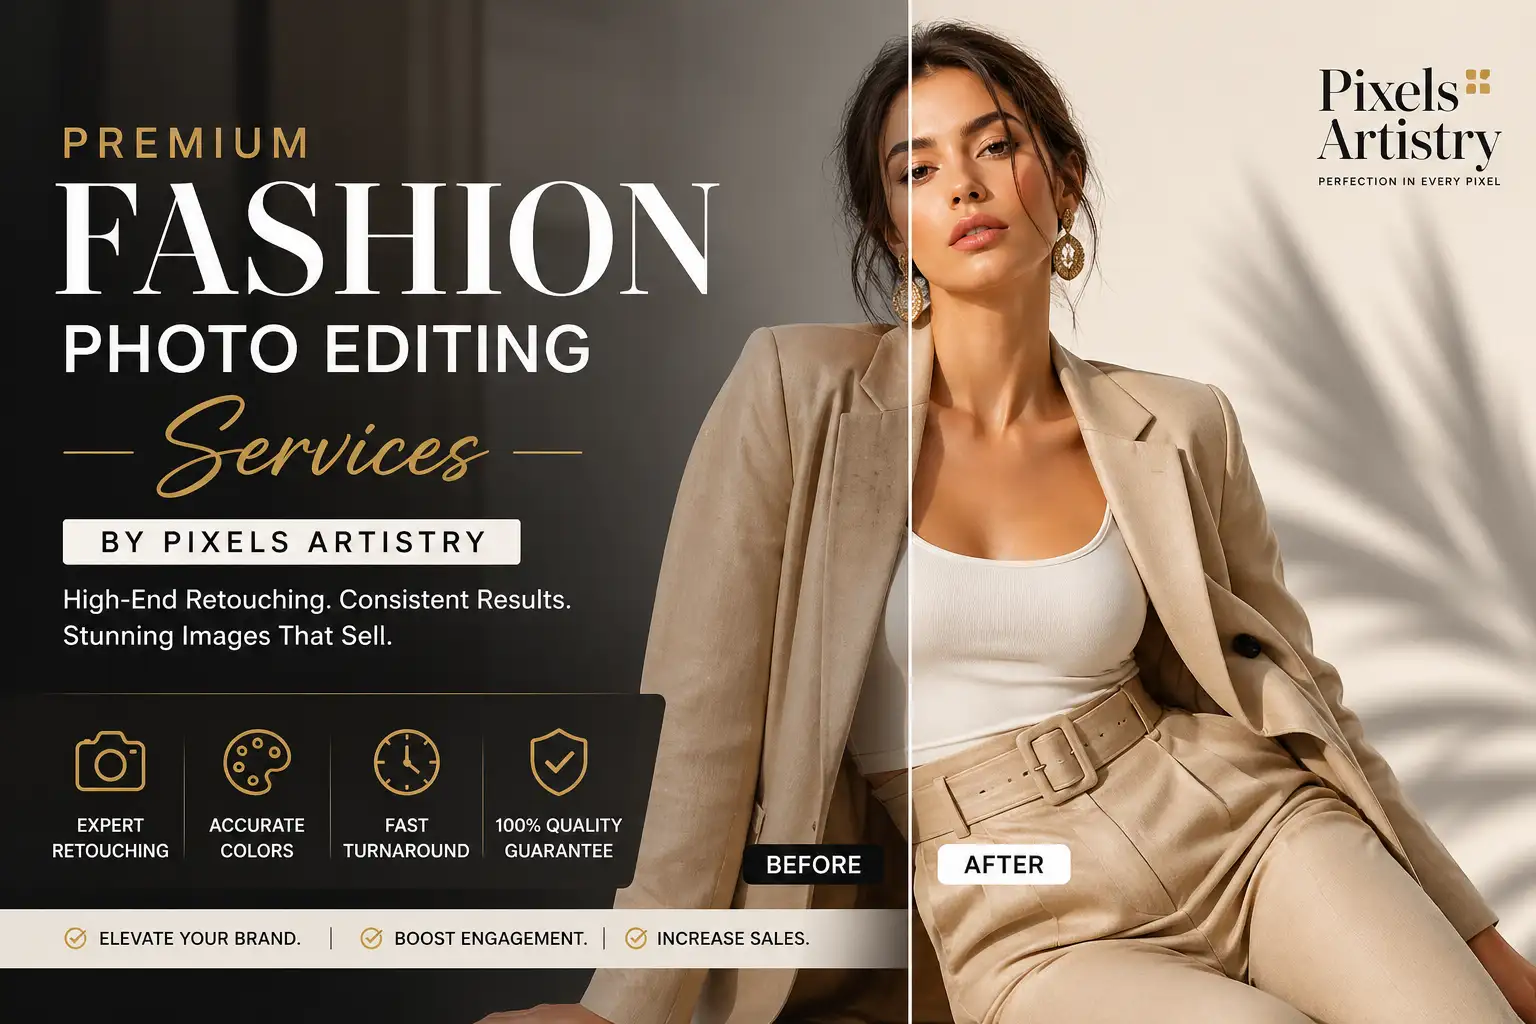
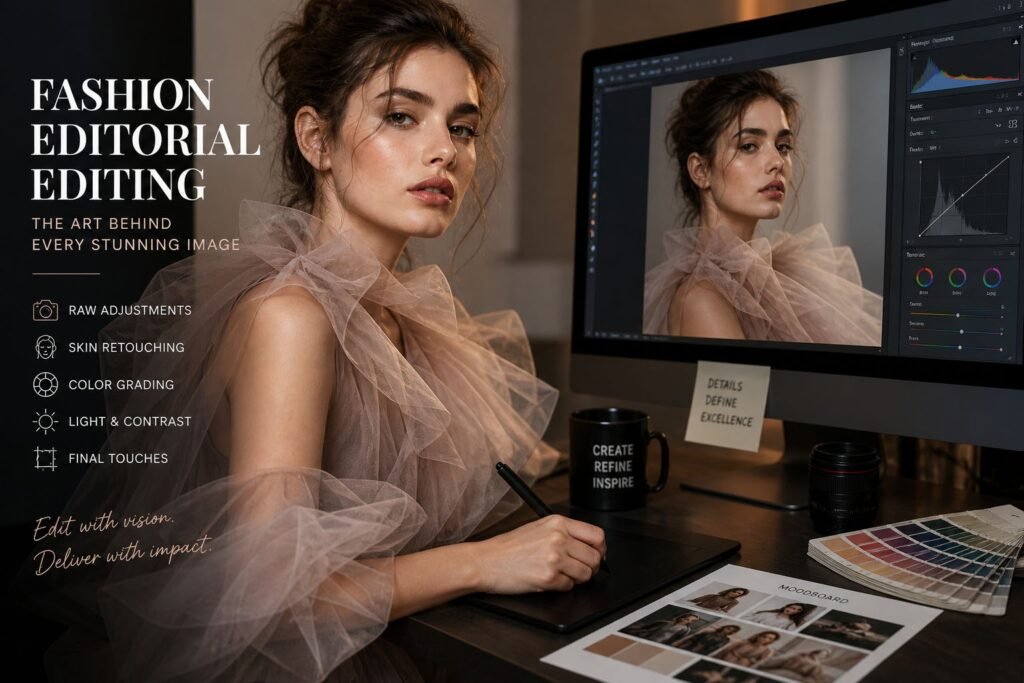
Fashion editorial imagery has evolved far beyond basic retouching. Today, it’s about storytelling, mood, precision, and creating visuals that feel both aspirational and authentic. When we talk about How to Edit Fashion Editorial Photos, we’re really talking about crafting an image that communicates style, emotion, and brand identity all at once. That’s why the editing process matters just as much as the shoot itself.
We approach fashion editing as a balance between artistry and technical control. It’s not about over-editing or chasing unrealistic perfection. Instead, it’s about enhancing what’s already there-bringing out textures, refining tones, and ensuring every detail aligns with the intended narrative. Whether it’s a high-fashion magazine spread or a modern digital campaign, the workflow remains rooted in precision and intention.
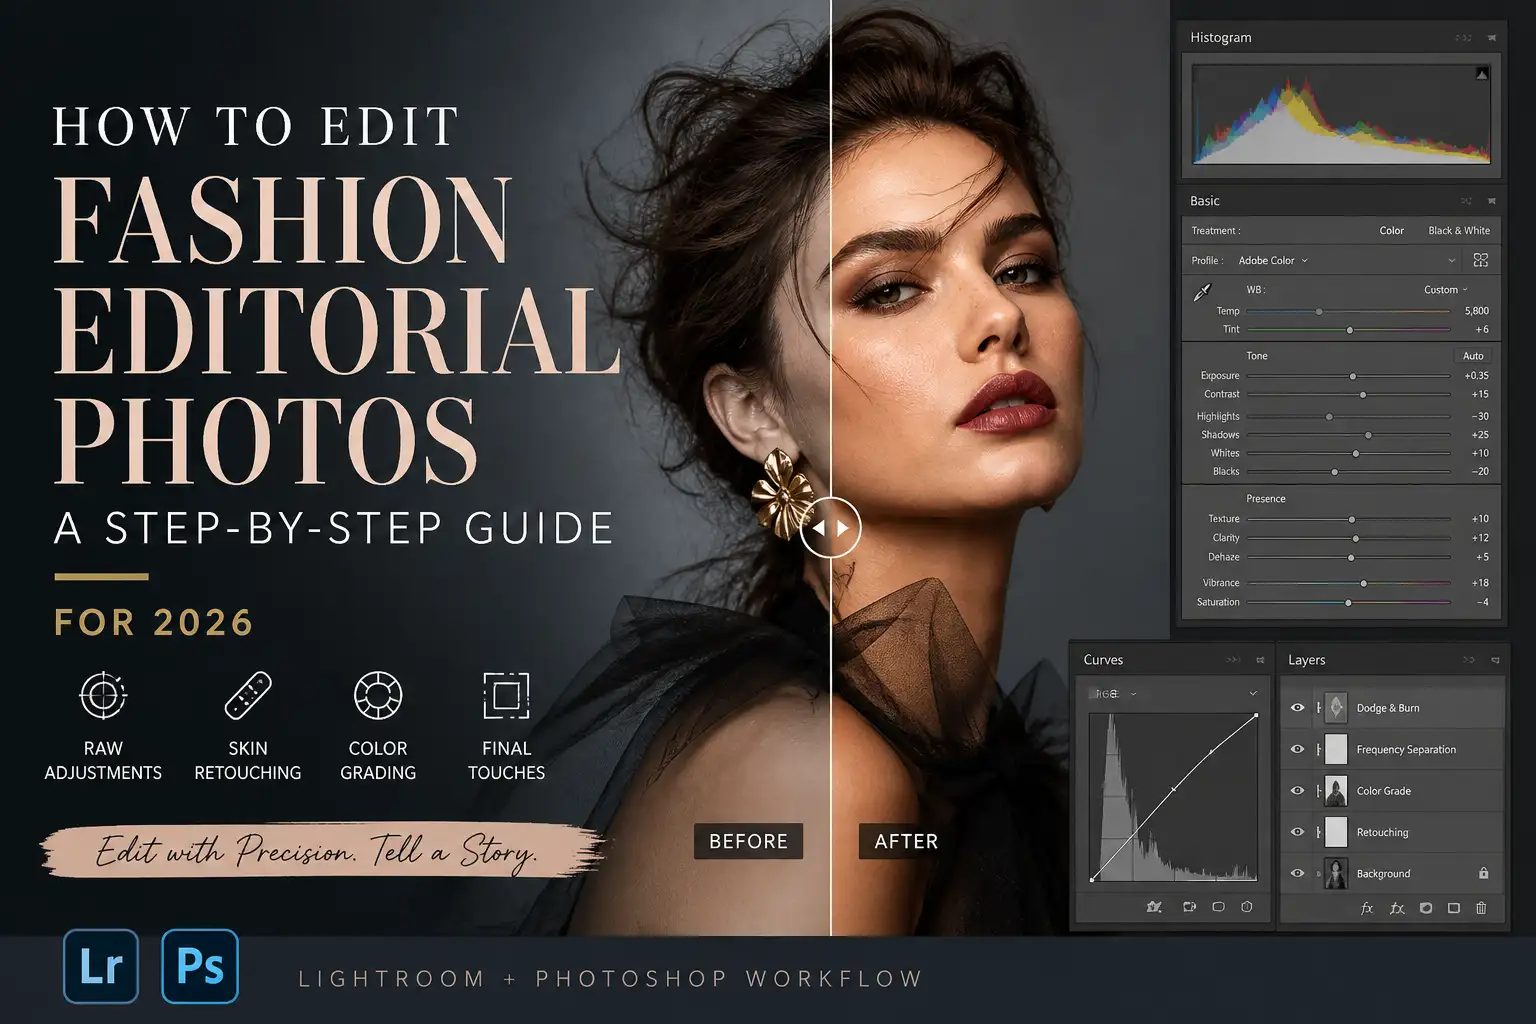
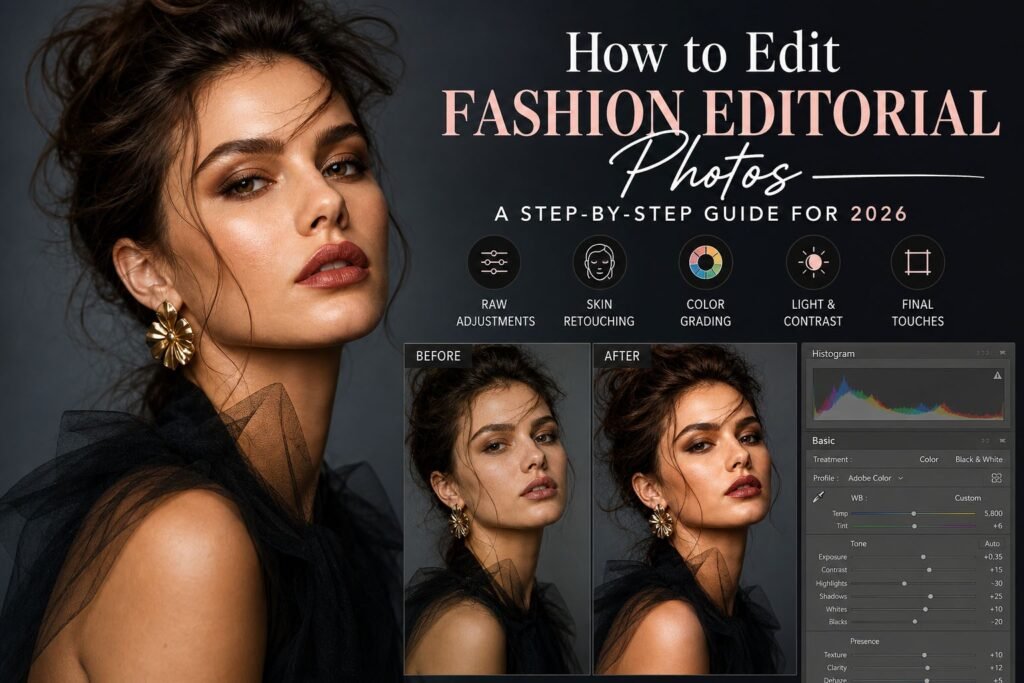
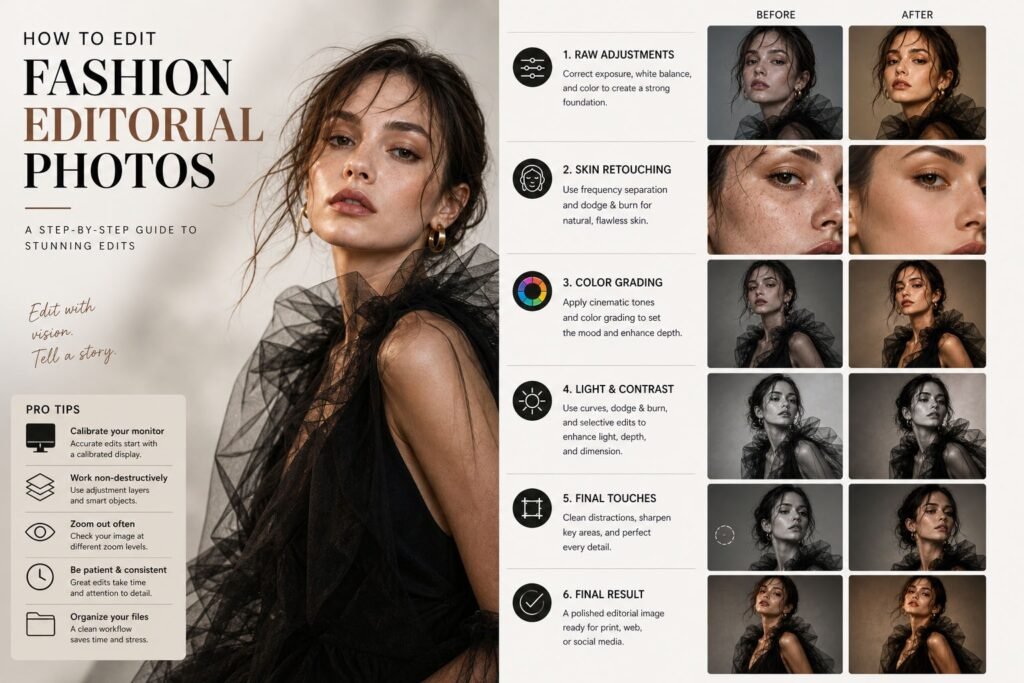
In this guide, we’ll walk you through How to Edit Fashion Editorial Photos step by step, using a process that’s both practical and adaptable for 2026 standards. We’ll break everything down into clear sections so you can follow along, improve your workflow, and elevate your final results.
Understanding the Purpose Before You Start Editing
Before opening any software, the first step in How to Edit Fashion Editorial Photos is understanding the purpose of the image. Every editorial shoot has a concept. Sometimes it’s bold and dramatic, sometimes soft and minimal, and sometimes experimental. If you skip this step, your editing will lack direction.
We always begin by analyzing the mood board or references. Look at lighting, color grading, contrast levels, and even skin tones. Are the images meant to feel cinematic? Clean and commercial? Vintage-inspired? Your editing decisions should support that vision, not override it.
Another important factor is the platform. Editorial images for print magazines often require more subtle retouching, while digital campaigns may allow for stronger color grading and sharper contrast. Understanding this early will guide every adjustment you make later.
When learning How to Edit Fashion Editorial Photos, this step is often overlooked, but it’s what separates average edits from professional ones.
Choosing the Right Software and Setup
The tools you use will define how efficiently you can execute your edits. Most professionals rely on a combination of Adobe Lightroom and Photoshop, and we do the same in our workflow.
Lightroom is where we handle bulk adjustments like exposure, white balance, and color grading. Photoshop, on the other hand, is where the real magic happens-skin retouching, frequency separation, dodge and burn, and detailed corrections.
When working through How to Edit Fashion Editorial Photos, it’s important to maintain a non-destructive workflow. Always use adjustment layers, smart objects, and masks. This gives you flexibility and ensures you can revisit any step without damaging the original image.
A calibrated monitor is also essential. Without accurate color representation, your edits may look completely different on other screens or in print. This is especially critical for fashion work, where color accuracy directly impacts brand perception.
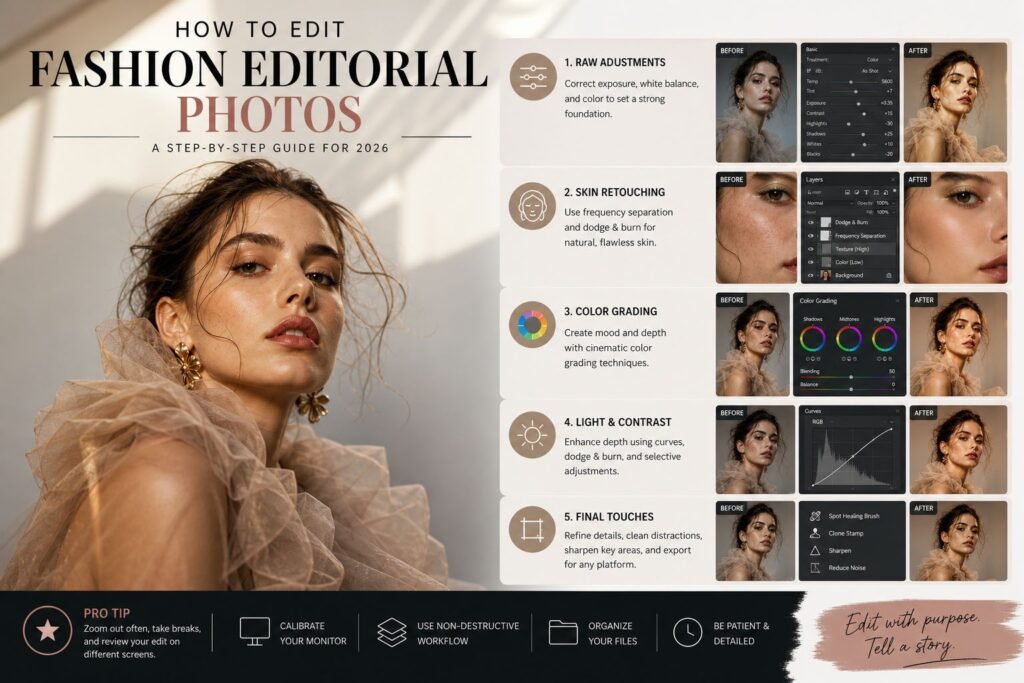
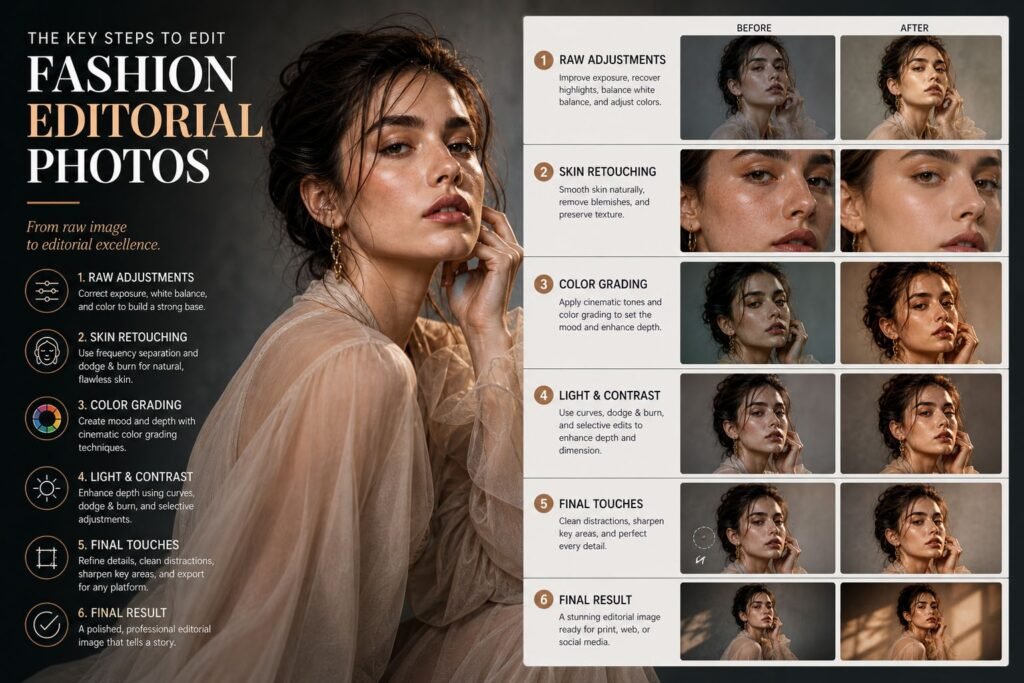
Starting with Raw Adjustments in Lightroom
The first hands-on step in How to Edit Fashion Editorial Photos begins in Lightroom. This is where you set the foundation for everything that follows.
We start by adjusting exposure and contrast to ensure the image has a balanced tonal range. Highlights should not be blown out, and shadows should retain detail. From there, we correct white balance to achieve natural skin tones.
Next comes color. Instead of applying heavy presets, we fine-tune individual color channels. Adjusting hues, saturation, and luminance allows us to control how each element in the image appears. Skin tones should remain realistic, while clothing colors should stay true to the brand.
Clarity and texture adjustments should be used carefully. Overdoing them can make skin look harsh, which is the opposite of what editorial work demands. Subtlety is key here.
This stage might seem simple, but it’s one of the most important parts of How to Edit Fashion Editorial Photos because it sets the baseline for all advanced retouching.
Skin Retouching with Precision and Care
Skin retouching is where many editors either shine or fail. In fashion editorials, the goal is not to remove every imperfection but to refine the skin while preserving its natural texture.
When we approach How to Edit Fashion Editorial Photos, we rely heavily on frequency separation and dodge & burn techniques. Frequency separation allows us to separate texture from color, making it easier to correct uneven tones without damaging skin detail.
Dodge and burn, on the other hand, is used to sculpt the face and body. By carefully brightening and darkening specific areas, we create depth and dimension. This technique requires patience but delivers the most natural results.
Avoid using blur filters or heavy smoothing tools. These may seem faster, but they often result in plastic-looking skin, which is unacceptable in high-end editorial work.
Remember, great retouching should be invisible. If someone can tell the image has been heavily edited, something went wrong.
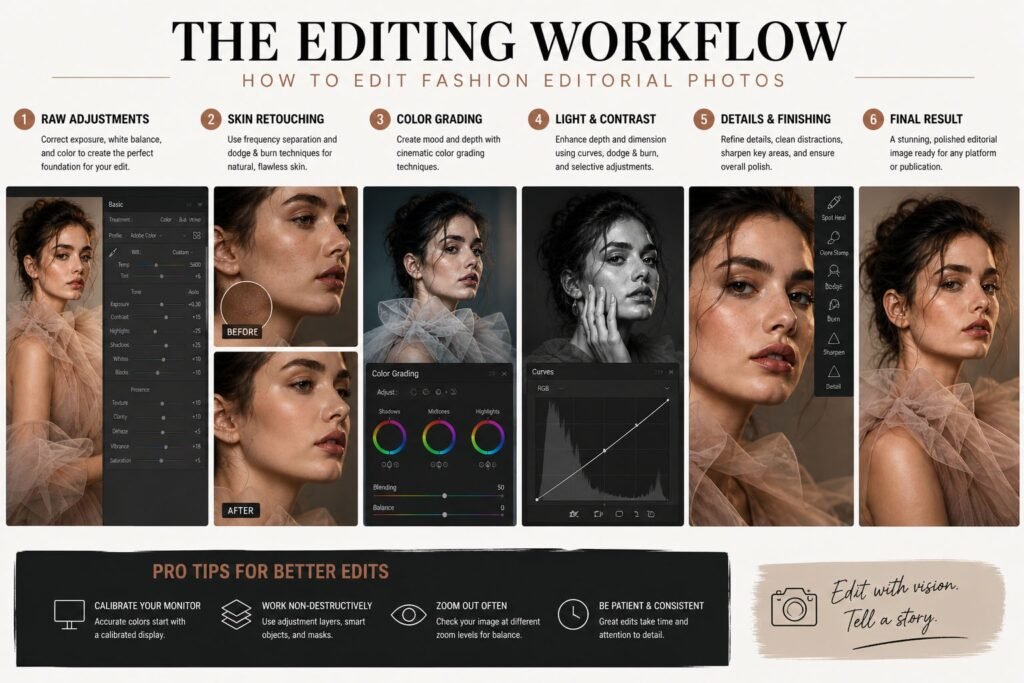
Enhancing Lighting and Depth
Lighting plays a crucial role in How to Edit Fashion Editorial Photos. Even if the original image was well-lit, post-processing can enhance depth and drama significantly.
We use curves and selective adjustments to shape the light. Brightening highlights and deepening shadows can add contrast and make the subject stand out more. However, this should always align with the original lighting direction to maintain realism.
Gradient masks are particularly useful for controlling light across the frame. For example, you can subtly darken the background while keeping the subject bright, guiding the viewer’s attention exactly where you want it.
Adding depth is not about making the image darker or brighter overall. It’s about creating a visual hierarchy where every element has its place.
This step is what transforms a flat image into something visually compelling, which is why it’s essential in mastering How to Edit Fashion Editorial Photos.
Color Grading for Editorial Impact
Color grading is where your creative vision truly comes to life. It’s also one of the defining elements of How to Edit Fashion Editorial Photos in 2026.
We usually start with a base color balance and then introduce subtle tones to create a mood. For example, adding warm tones to highlights and cooler tones to shadows can create a cinematic feel. Alternatively, a neutral palette can give the image a clean, modern look.
Consistency is critical. If you’re editing a full editorial set, all images should share a cohesive color style. This ensures the final series feels unified and professional.
Split toning, color balance layers, and gradient maps are powerful tools for achieving this. The key is to apply them gradually and avoid overdoing any effect.
Color grading should enhance the story, not distract from it. When done right, it becomes one of the most impactful steps in How to Edit Fashion Editorial Photos.
Refining Details and Final Touches
The final stage of How to Edit Fashion Editorial Photos is all about refinement. This is where we zoom in and perfect every detail.
We clean up distractions in the background, fix minor wardrobe issues, and ensure edges are sharp and clean. Hair retouching is especially important-stray hairs should be controlled without making the hair look unnatural.
Sharpening is applied selectively, focusing on key areas like the eyes, lips, and clothing textures. Over-sharpening the entire image can ruin the softness that editorial photography often requires.
We also check the image at different zoom levels. Sometimes an edit looks perfect up close but feels off when viewed as a whole. This step ensures consistency across all viewing conditions.
At this point, the image should feel complete-balanced, polished, and aligned with the original vision.
Working with Backgrounds and Environment
The background plays a crucial role in How to Edit Fashion Editorial Photos, yet it’s often underestimated. A strong subject can lose impact if the background feels distracting or inconsistent.
We begin by evaluating whether the background supports the story. If it doesn’t, subtle adjustments can make a significant difference. This might include softening details, adjusting colors, or even reshaping light to reduce distractions.
Color harmony is essential here. The tones in the background should complement the subject rather than compete with it. Sometimes, a slight desaturation or color shift can bring everything into balance.
In more complex edits, we may use compositing techniques to replace or enhance parts of the background. However, this must be done carefully to maintain realism. Shadows, reflections, and perspective all need to align perfectly.
Understanding how to control the environment is a major part of mastering How to Edit Fashion Editorial Photos, especially for high-end editorial work.
Maintaining Natural Skin Texture and Realism
One of the biggest challenges in How to Edit Fashion Editorial Photos is maintaining authenticity. Over-editing can quickly strip away the natural beauty of the subject.
We always prioritize texture preservation. Skin should look like skin, not plastic. This means working at a lower opacity, building adjustments gradually, and constantly zooming in and out to check consistency.
Color consistency is equally important. Uneven skin tones can be corrected, but they should still look believable. Subtle variations are natural and should not be completely removed.
We also avoid excessive sharpening on skin. While it’s important for certain details, overdoing it can emphasize imperfections and create an unnatural look.
The goal is to enhance, not erase. When done correctly, viewers won’t notice the editing-they’ll simply see a beautiful, polished image.
Creating a Consistent Editorial Style
Consistency is what separates a collection of images from a cohesive editorial story. When learning How to Edit Fashion Editorial Photos, developing a recognizable style is essential.
We achieve this by creating a consistent workflow. From initial raw adjustments to final color grading, each step follows a structured process. This ensures that every image maintains the same visual language.
Presets and custom LUTs can help, but they should never replace manual adjustments. Each image is unique, and your editing should reflect that while still staying within the overall style.
We also pay attention to pacing within a series. Some images may be brighter, others darker, but they should still feel connected. This balance creates a narrative flow that enhances the viewer’s experience.
A strong editorial style not only improves your work but also makes it more recognizable and impactful.
Common Mistakes to Avoid in Editorial Editing
Even experienced editors can fall into common traps when working on How to Edit Fashion Editorial Photos. Recognizing these mistakes early can save you time and improve your results.
One of the most frequent issues is over-retouching. It’s easy to get carried away with smoothing skin or removing every imperfection. However, this often results in an artificial look that lacks depth and character.
Another mistake is inconsistent color grading. If each image in a series has a different tone, the overall editorial loses its cohesion. Always review your images together, not just individually.
Ignoring details is another problem. Small distractions like stray hairs, uneven edges, or color inconsistencies can reduce the overall quality of your work.
Finally, rushing the process can lead to uneven results. High-quality editorial editing takes time, and every step deserves attention.
Avoiding these mistakes is a key part of improving your understanding of How to Edit Fashion Editorial Photos.
Optimizing Your Workflow for Speed and Quality
Efficiency becomes increasingly important as you take on more projects. A streamlined workflow allows you to maintain quality while working faster.
We organize our files carefully, keeping raw images, edited versions, and exports clearly labeled. This prevents confusion and ensures a smooth editing process.
Batch processing in Lightroom can save significant time for initial adjustments. From there, we move into Photoshop for detailed retouching.
Keyboard shortcuts, custom actions, and presets all contribute to a faster workflow. However, they should enhance your process, not replace your judgment.
When working on How to Edit Fashion Editorial Photos, the goal is to find a balance between speed and precision. Cutting corners may save time in the short term, but it often leads to lower-quality results.
Preparing Images for Different Platforms
In 2026, editorial images are used across multiple platforms, each with its own requirements. Understanding how to prepare your images is a crucial part of How to Edit Fashion Editorial Photos.
For print, resolution and color accuracy are critical. Images should be exported in high resolution with the appropriate color profile to ensure they look correct when printed.
For digital platforms, file size and sharpness become more important. Images should be optimized for web use without losing quality.
Social media adds another layer of complexity. Cropping, aspect ratios, and compression all affect how your images appear. Adjusting your exports accordingly ensures your work looks its best everywhere.
Adapting your final output to different platforms ensures your edits remain effective and professional.
Final Thoughts on Mastering Fashion Editorial Editing
Mastering How to Edit Fashion Editorial Photos is not about following a rigid set of rules. It’s about understanding the principles behind each step and applying them thoughtfully.
Every image presents a new challenge, and every edit is an opportunity to refine your skills. The more you practice, the more intuitive the process becomes.
We’ve found that the best results come from a combination of technical knowledge and creative vision. Neither works well without the other. When you bring both together, your edits begin to stand out.
Let Us Help You Achieve Professional Results
If you’re looking to take your fashion images to the next level but don’t have the time to handle detailed editing yourself, that’s where we come in.
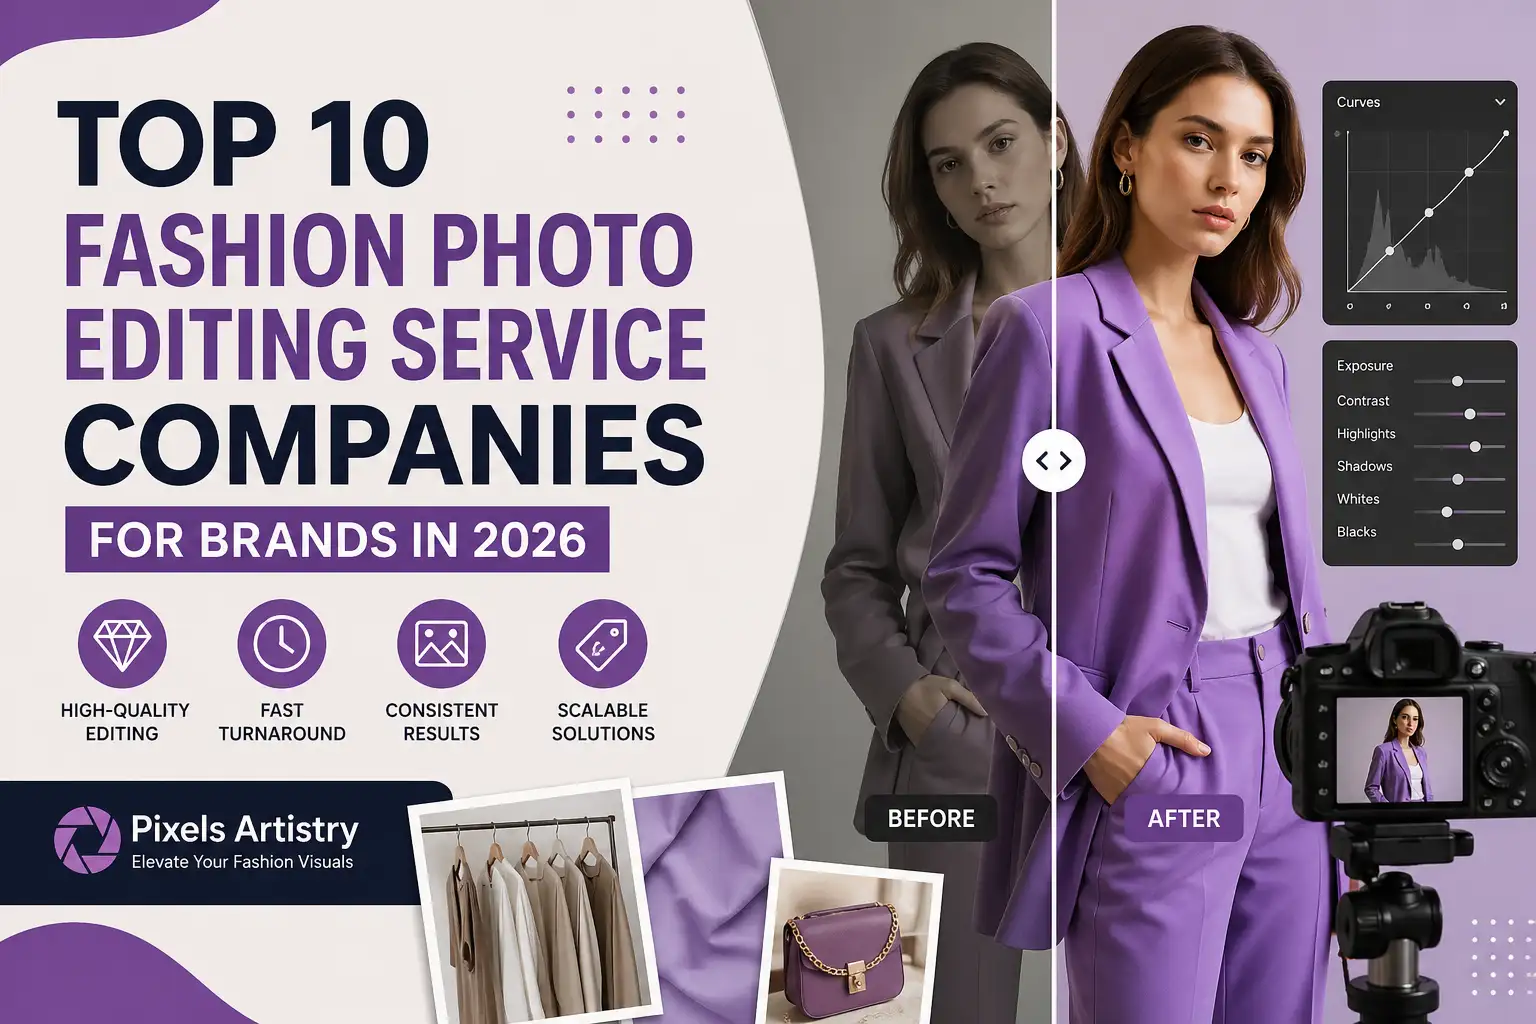
At Pixels Artistry, we specialize in high-end image editing tailored for fashion, e-commerce, and editorial work. We understand exactly what goes into How to Edit Fashion Editorial Photos, and we apply those techniques to deliver clean, natural, and impactful results.
Whether you need precise skin retouching, advanced color grading, or full editorial enhancement, we’re here to help you create images that truly stand out.
Let’s turn your raw captures into polished editorial masterpieces.